Trezor Suite — The Complete Guide to Securely Managing Your Crypto
Trezor Suite is the official desktop and mobile application developed by SatoshiLabs to manage Trezor hardware wallets and your cryptocurrency holdings. It is the central hub that allows you to securely manage accounts, send and receive assets, interact with DeFi and Web3 applications, and update your device firmware—all while keeping your private keys offline and safe.
This guide provides a comprehensive, step-by-step explanation of Trezor Suite, its features, setup process, security measures, and best practices for managing your digital assets safely.
Introduction: What Is Trezor Suite?
Trezor Suite is more than just a wallet interface; it is a security-focused ecosystem designed to work with Trezor hardware wallets. Unlike software-only wallets, Trezor Suite ensures that your private keys never leave the hardware device. By combining user-friendly design with advanced security protocols, Trezor Suite empowers users to manage cryptocurrency confidently.
Key features include:
Secure transaction signing
Multi-currency support (Bitcoin, Ethereum, Cardano, Solana, and more)
Integration with decentralized finance (DeFi) and Web3 applications
Firmware management for Trezor devices
Backup and recovery functionality
Whether you are a beginner or an experienced crypto user, Trezor Suite is designed to make secure asset management intuitive.
Step 1: Download and Install Trezor Suite
To start using Trezor Suite, visit the official website trezor.io/start. Download the version compatible with your operating system:
Windows
macOS
Linux
iOS
Android
Important: Always download Trezor Suite from the official source to avoid phishing scams. Avoid third-party links or emails claiming to provide the software.
After downloading:
Open the installer
Follow on-screen instructions
Launch Trezor Suite once installation is complete
Trezor Suite acts as the central hub for all your device interactions, including account management, crypto transfers, and firmware updates.
Step 2: Connect Your Trezor Device
Once Trezor Suite is installed, connect your Trezor hardware wallet via the provided USB cable. For Trezor Model T, a touchscreen allows you to interact directly with the device for confirmations and input.
Upon connection, the software will:
Detect your device
Prompt you to either set up a new wallet or recover an existing one
Guide you through firmware installation if necessary
Step 3: Initialize Your Trezor Wallet
Trezor Suite guides you through the initial setup:
Create a new wallet: Generates a new set of private keys stored on your Trezor device.
Recover wallet: Restores an existing wallet using your recovery seed.
If this is your first Trezor, select Create a new wallet.
Step 4: Setting Up Security Features
Security is the core of Trezor Suite. During setup, you will:
4.1 Set a PIN Code
The PIN prevents unauthorized access to your device if it is physically stolen. Recommendations:
Choose a non-obvious combination
Memorize your PIN—Trezor cannot recover it for you
Too many incorrect attempts temporarily block access
4.2 Set a Recovery Seed
The recovery seed is a critical backup:
Trezor generates a 12, 18, or 24-word phrase
Write it on the supplied recovery card
Store offline in a safe location
The recovery seed is the only way to restore your wallet if the device is lost or damaged.
Step 5: Using Trezor Suite Dashboard
The Trezor Suite dashboard provides a clear overview of your crypto holdings:
Portfolio balances
Recent transactions
Account management
Asset-specific actions (send, receive, stake)
Its intuitive interface makes it easy to navigate multiple accounts and monitor assets securely.
Step 6: Managing Cryptocurrency Accounts
Trezor Suite allows you to add accounts for supported cryptocurrencies:
Open Trezor Suite
Click Add Account
Select the cryptocurrency
Confirm the account on your device
Each account provides real-time balance updates, transaction history, and detailed asset information.
Step 7: Receiving Cryptocurrency
To receive crypto through Trezor Suite:
Select the account
Click Receive
Verify the address displayed on your Trezor device
Copy the address exactly as displayed
Verifying addresses directly on the device prevents malware from altering them, ensuring funds reach the correct destination.
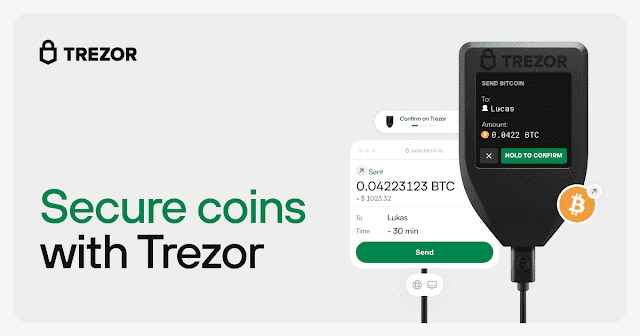
Step 8: Sending Cryptocurrency
Sending crypto with Trezor Suite involves:
Selecting the account
Clicking Send
Entering the recipient address and amount
Confirming the transaction on your Trezor device
The transaction is signed offline on the hardware device, keeping your private keys secure at all times.
Step 9: Firmware Updates
Trezor Suite notifies you when a firmware update is available. Updates improve device security and functionality.
Steps to update:
Connect your Trezor
Open Trezor Suite
Follow on-screen instructions to install the update
Confirm the update on your device
Firmware updates do not compromise your funds if performed correctly.
Step 10: Advanced Features
10.1 Passphrase Protection
Trezor allows adding a passphrase to your recovery seed, creating a hidden wallet. This adds an extra security layer:
Only accessible with the passphrase
Protects against physical theft
10.2 Staking and DeFi
Trezor Suite supports staking for assets like ETH, ADA, and DOT. Users can also connect to decentralized finance platforms securely:
Staking rewards accrue directly to your Trezor wallet
DeFi interactions are signed offline, reducing risk of hacks
10.3 Web3 Integration
Trezor Suite integrates with Web3 wallets and dApps, allowing:
Secure interaction with smart contracts
NFT management
Participation in decentralized exchanges
Step 11: Backup and Recovery
If your Trezor device is lost or damaged, recovery is straightforward:
Obtain a new Trezor device
Choose “Recover wallet” in Trezor Suite
Enter your recovery seed
Restore accounts
Important: Recovery is only possible with your private recovery seed.
Step 12: Best Security Practices
To maximize security:
Keep your recovery seed offline and safe
Use a strong, unique PIN
Avoid sharing your device or recovery seed
Only download Trezor Suite from the official site
Verify transaction addresses on the device screen
Update firmware promptly
Following these practices ensures your crypto remains safe from hacks and scams.
Step 13: Troubleshooting Common Issues
Some common issues and solutions in Trezor Suite:
Device not recognized: Check USB connection and use official cables
PIN entry issues: Restart device and verify firmware
Software update failures: Ensure internet connection is stable and antivirus is not blocking the installer
Account balance not updating: Refresh Trezor Suite and reconnect the device
Trezor also provides official support and documentation for additional guidance.
Step 14: Benefits of Using Trezor Suite
Trezor Suite offers:
Full control over your private keys
Secure transaction signing
Multi-asset management
Integration with staking, DeFi, and Web3
Recovery and backup solutions
Intuitive interface for beginners and advanced users
It combines security, usability, and flexibility in one platform, making it ideal for anyone managing cryptocurrency.
Final Thoughts
Trezor Suite is the ultimate companion for Trezor hardware wallets. From setup to daily management, it provides a secure and user-friendly environment for storing and managing cryptocurrencies. By following this guide, you now understand:
How to install and set up Trezor Suite
Security measures, including PIN and recovery seed
Adding, sending, and receiving crypto
Using advanced features like staking, DeFi, and Web3
Backup, recovery, and best practices for long-term security
With Trezor Suite, your cryptocurrency assets are not only secure but also easy to manage. It gives you peace of mind, knowing that your private keys remain safely offline while providing access to a modern, feature-rich interface for all your crypto needs.